Okay, folks, let’s dive into how I made my own custom NASCAR diecast. It’s a bit of a process, but totally worth it if you’re a huge fan like me.
First, I picked out a diecast car. I went with a 1/24 scale, because, you know, go big or go home! It was just a plain white one, a blank canvas, if you will. It’s important to use one like this to make it easier.

Then, I got all my supplies together. Think of it like baking a cake – gotta have all your ingredients ready. Here’s what I used:
- Decal paper (waterslide, clear for dark colors, white for light)
- Spray paint (automotive primer and your chosen colors)
- Clear coat spray (glossy, for that shiny finish)
- Small paint brushes (for any touch-ups)
- Hobby knife (exacto knife, whatever you call it)
- Sandpaper (super fine grit, like 1000 or higher)
- Painter’s tape
- A bowl of warm water (for the decals)
- Tweezers (optional, but helpful for tiny decals)
- Patience (lots and lots of it!)
The Fun Begins (aka Prepping the Car)
Next, I took the car apart as much as I could. Usually, you can unscrew the chassis from the body. I kept all the little screws in a safe place ’cause those things are easy to lose!
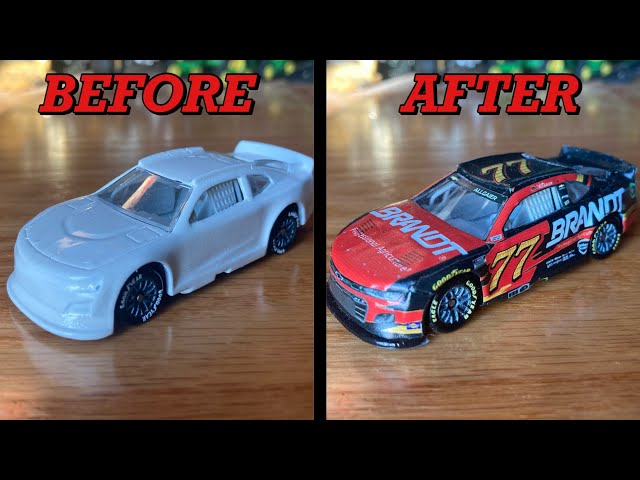
Then came the sanding. I gently sanded the body of the car to get rid of the existing paint and give the new paint something to grip onto. Don’t go crazy here, just a light scuffing is all you need.
After sanding, I wiped the car down with a damp cloth to remove any dust. Then, I primed the body with a few thin coats of automotive primer. Let each coat dry completely before adding the next. This is key for a smooth finish.
Painting Time!
Once the primer was dry (I usually wait at least 24 hours), I started painting the base color. Again, thin coats are your friend. Multiple thin coats look way better than one thick, gloppy coat. I learned that the hard way, trust me. I let each coat dry, and sometimes I’d even do a super light sanding between coats with that fine-grit sandpaper.
Decal Application
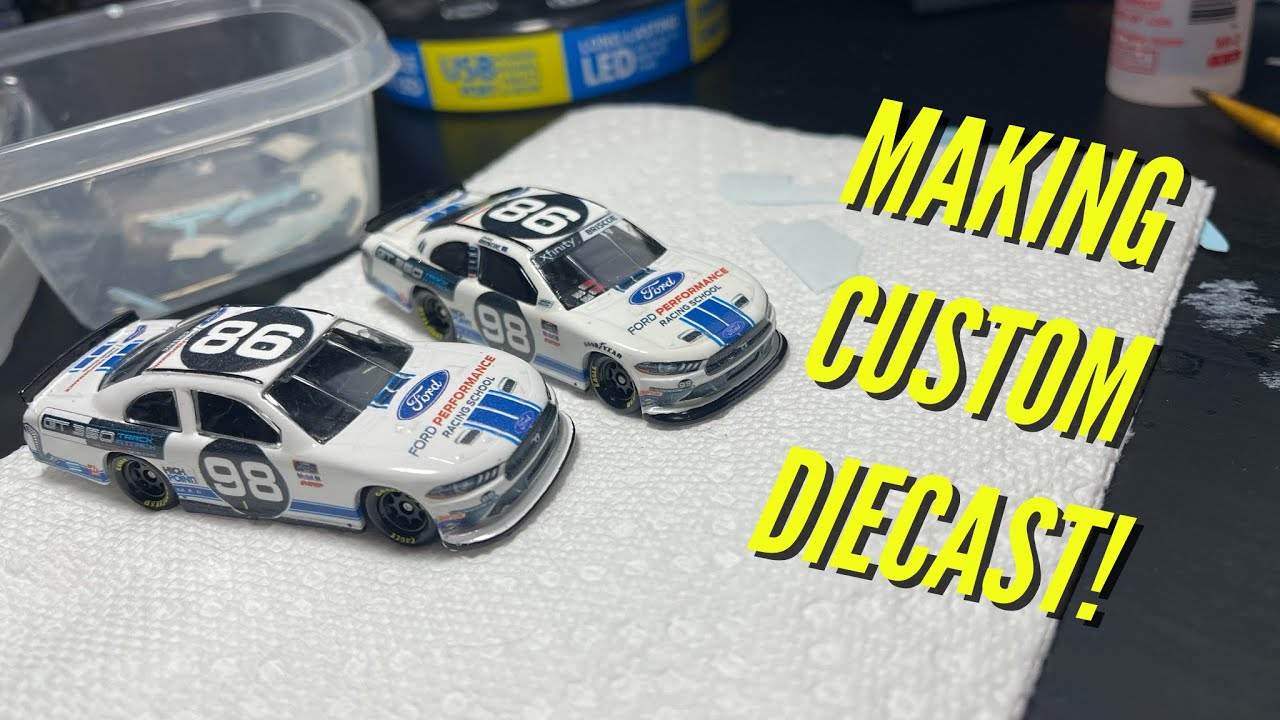
Now for the decals! I designed my own decals. I got some pictures I wanted, and sized them for the car. Then print them onto the waterslide decal paper. Make sure you using the right kind of paper, it’ll make it so much easier.
I carefully cut out each decal with my hobby knife, leaving as little extra paper around the design as possible.
Then, one by one, I dipped each decal in the warm water for about 10-15 seconds. You’ll know it’s ready when the decal starts to slide off the backing paper.
I carefully slid the decal onto the car, using my fingers and the tweezers to position it just right. Once it was in place, I gently dabbed it with a soft cloth to remove any excess water and air bubbles.
It’s important to work slowly and carefully with the decals. They’re delicate and can tear easily.
Final Touches
After all the decals were applied and dry (again, I waited at least 24 hours), I sprayed the whole car with a few coats of clear coat. This protects the decals and gives the car that awesome, glossy finish.
Finally,I do some more lightly sanding with the super fine grit sandpaper, and wipe down the car.
Once the clear coat was completely dry, I reassembled the car, putting the chassis back on and screwing everything back together.
And there you have it! My custom NASCAR diecast. It took some time and effort, but seeing the finished product made it all worthwhile. It’s not perfect, but it’s mine, and that’s what makes it special. Now it sits proudly on my shelf, a testament to my love for racing and my questionable crafting skills!


